Friday, July 4, 2014

Independence Day Nail Art

Happy Fourth of July to all of our readers!

Photo courtesy of funcheap.com
I decided to celebrate the holiday last night by painting American flags on my nails after finding this pin on Pinterest. It was surprisingly much harder than I thought, but I got compliments today on it, and I like it, so I'm pleased.

What you will need:

  • Polishes in red, white and blue
  • Silver glitter, preferably one with round glitter in it
  • Nail art striping brush
I wanted to try to replicate the picture as best as I could but with a more royal blue, so I chose Julep Kenya for the red, OPI Blue Your Mind for the blue, Sinful Colors Snow Me White for the white and OPI Pirouette My Whistle for the glitter. I used a striping brush by butter London. 

Process:

1) Prepare all of the supplies you will need, including your polish, brushes, a clean-up brush, acetone, base and top coats, and a piece of foil to dribble the red and white on for the flag portion. 
2) Apply your base coat and allow to dry.
3) Apply two coats of your blue, leaving a diagonal line at the top of your nail and space for the striping. Allow to dry.


4) Apply two coats of your red on the tips, slightly overlapping the blue but keeping the line where the two colors meet as straight as possible. It doesn't have to be perfect as this line will be covered by white. Allow to dry.


5) Apply a good-sized blob of white to the foil. Take your striping brush and start with the line where the blue and red meet. Brush a thin line over this area and then repeat with two stripes above in the red area. Clean your striping brush in acetone. Because of the dark colors of the red and blue, I had to go over the white lines twice to ensure that the white was completely opaque.
6) Apply a good-sized blob of red to the foil. Take your striping brush and straighten out the lines if needed with the red. I found that by the time I got to the striping, my hands were shaking from the concentration and my white lines weren't completely straight. Applying red lines between the white cleaned that up.
7) Apply your glitter to the blue area of each nail. My glitter that I chose was a microglitter with round glitter in the suspension so I made sure that there was 1-2 pieces on the brush before applying it so I had a combination of microglitter and round glitter on each nail.


8) Apply top coat. 
9) Use your clean-up brush dipped in acetone to clean up any errors. Because of the different shapes of the art, I found that my edges needed to be cleaned up a lot.
10) Finally, apply one last coat of top coat. 


Pair your mani with a red or blue ring and your best patriotic duds (I wore a blue eternity band, red t-shirt and glitter star earrings that I got on sale at Walmart) and you are all set to be patriotic in style!

I hope everyone is safe today and has a great time, whatever you are doing!

Sunday, June 29, 2014

Polish Review ~ Jamberry Nails Mahogany

It's amazing to reconnect with old friends and find out what they are doing twenty years later. I was invited to an online shopping party several weeks ago on Facebook hosted by two of my old friends. After a little chatting and instant messaging, I reconnected with an old friend from high school and college, Amanda, who I discovered is a Jamberry Nails consultant as her second job. 

First of all, with over 400 bottles of nail polish, I have accepted that my nail destiny (if such a thing exists) is lacquer on natural nails. I've tried fake nails and acrylics, and hated them both. So normally I wasn't that intrigued at first by the nail wraps. However, from what I have heard about these wraps, people really seem to love them, and they are a convenient and durable alternative to complicated nail art and a cost-effective alternative to having your nails done up all fancy at the salon. Jamberry Nails was founded by three sisters who decided to start this company as an alternative to spending lots of time and money at the salons on manicures. The product has been featured in a number of magazines, and is available in so many designs and colors, I didn't even attempt to count. Each design is $15 per sheet, which includes a variety of sizes and shapes to be able to fit your toes and fingers. Application appears to be very simple and there are detailed instructions on the website. The only equipment needed is a cuticle pusher, alcohol wipes, a hair dryer and a pair of scissors for trimming the wrap. It is a very cool and fun alternative to painting your nails! With Amanda's permission, I am quoting a testimonial from one of her customers who is a nurse after she tried a sample: "It still looks great after one week of working in my flower beds, and washing my hands 100 times a day as a nurse. I am impressed." 

To share, I have a picture of toes from my old friend Lisbeth, who hosted the party and is also very happy with the product. This picture was taken five days after application.

Photograph courtesy of jamberrynails.net
After Amanda posted that Jamberry Nails sells a line of lacquer, my ears perked RIGHT up. After examining the line of polishes, I settled on Mahogany. I really love brown polishes. They are so unique, they range in spectrum from glittery bronze to melted chocolate to espresso shades, and they look great with just about everyone's skin tone. 

My review today is going to be primarily on the lacquer as I have not tried the wraps; I also purchased the Matte Finish Top Coat which will be reviewed as part of an article that I am working on to compare the top lacquer manufacturer matte toppers, so watch for that article if you are a matte finish fan.

The Professional Nail Lacquer sold by Jamberry Nails is 5-free (meaning that it is free of the top five chemicals used in nail polishes that can be harmful to your health). Nail lacquer is a paint. Long-term exposure to the fumes if it is loaded with chemicals isn't going to be good for you. If you gave me a smell test with my older polishes against my newer 3-free and 5-free polishes, I would win every time, because the older polishes smell very, very strong, whereas the newer 3-free and 5-free polishes, like Zoya, have a very slight smell and aren't as strong. 5-free means that it is free of dibutyl phthalate (DBP), formaldehyde, toluene, formaldehyde resin and camphor. Now, why is this important? That honestly depends on you. If you are pregnant, using your nail polish on your children, have respiratory issues or allergies, this is something that very much could be important to you. I recommend that if this is something that is a concern for you, you research it on your own or discuss with your doctor. For me, I honestly prefer the 3-free and 5-free formulas because they just don't smell as bad. The health issues with inhaling these chemicals, I would think, are more of an issue for factory workers that are working with this formula all the time, and not so much for the end user that is spending probably ten minutes or so inhaling the chemical. I probably harm myself more by inhaling my pure acetone nail polish remover. As for formaldehyde, I make sure that I have my fan on when I am polishing and I'm not allergic, so it's not an issue for me personally, but if you are allergic to formaldehyde, a 5-free formula is a good thing for you. I invite you to read this article if you are interested in more information on the chemicals used in nail polish and how it can affect you. 

Another benefit to Jamberry Nails is that it is cruelty-free or CF for short. I just recently learned what this means in terms of nail polish, and honestly, I would rather not get into the details on my blog. It's extremely horrifying when you learn what nail polish manufacturers do to test their products on animals, and it is your personal choice on whether or not you choose to continue supporting those manufacturers. I have chosen not to. If you are interested in reading more about cruelty-free lacquers and cosmetics, I invite you to check out this article on the PETA website where you will find out more than you ever wanted to know about cruelty-free beauty products. All That Sparkles and Shimmers will have an article discussing cruelty-free cosmetics and nail polishes in the future, so if that is something that interests you, stay tuned.

However, for the purposes of this article, Jamberry Nails are 5-free AND cruelty-free, so it's a win-win in both categories!

Photograph courtesy of overclock.net
Appearance

Mahogany makes me think of melted chocolate with a shimmer. The first thing I pictured when painting my nails was the chocolate river in Willy Wonka and the Chocolate Factory. It is a beautiful rich brown with a continuous shimmer running through it that picks up the sunlight and sparkles delightfully. 

Application

The first thought that I had when I was painting my nails with this wonderful formula was how comparable it was to the butter London lacquer formula, which is the priciest lacquer that I own. I often laugh that the butter in butter London is because the polish applies like butter...and it was the same with Jamberry. It is very silky, rich and thick, but not so thick that it is hard to work with and needs thinner. If you are a person that likes one-coat polishes, this is a good polish for you as it was truly opaque in one coat. I chose to apply two because...well, that's my routine! I also like to have two coats of lacquer on my nails to prevent breakage. But I really could have easily stopped at one coat. 

The thing that impressed me the most regarding application was how this formula worked with corrections. I accidentally bumped my ring nail after the first coat and moved the lacquer before it had set. It was a pretty big smudge and I wasn't sure if I was going to be able to correct it, but I was able to move the smudge back in place with the tip of my tongue (gross, I know, but it works for corrections) and a wet fingertip. After applying the second coat, the lacquer absorbed the first coat's imperfection and the result was a silky coat that you could not even tell had been disturbed. 

Several days later, I tripped and hit my right hand on my footboard to catch myself, the uncoordinated chickie that I am. Not only did this polish keep my fingernail from breaking (which is what I anticipated), but the chip was very, very small indeed. I needed to correct it before I left for the day since I'm a nail biter and tend to pick at my polish if it's in my eye line, and a white spot on a brown nail is very noticeable. I corrected the chip by placing a dot of Mahogany on the chip, letting it set for a few seconds, and then applying a coat on the entire nail. It was as if it was never there. 


Durability

I would have loved to have left this polish on and see how long it went without any polishes, but I like to change out my color every few days. However, I kept a close eye on this one and with the except of the afore-mentioned klutzy moment, this polish did not chip or wrinkle or blemish with ordinary everyday wear and tear in the four days that I wore it. I applied it over Quimica Alemana and topped it with two coats of Jamberry Nails Matte Finish Top Coat. Amanda mentioned to me in our conversations that she has worn Cardinal by Jamberry Nails and it went a whopping six days without any chips or blemishes without a base or top coat...which is impressive as she is a realtor and on the go a lot! I would venture to guess that if I had left mine on, it would have gone for at least a week or two with no tip wear or chips. 

Removal

I removed it with regular cotton balls and acetone remover, and it wiped right off with no staining or resistance. 

Where to Buy

You can not get Jamberry Nails anywhere but online. I hadn't heard of it until I was invited to the online party, and it's only been around for a few years, so I doubt you'll be seeing booths at craft fairs or malls like you do Scentsy anytime soon. However, if you are interested in giving it a try, it is available through my friend Amanda's website at JamminAmanda.JamberryNails.net. There are eighteen lacquer colors, several packages of colors that you can order cheaper than ordering the colors individually, two base coats, one top coat and three special-effect top coats including the afore-mentioned Matte, a Stardust and a Glitter. It is on the expensive side of nail lacquer at $15.00 a bottle, and the only polish in that top shelf category I have to compare it to is butter London. My opinion? It is every bit as good of a formula as butter London, if not better due to the correctability that I mentioned and the durability, and if you are looking for some good quality lacquers to add to your collection that are going to last, that look great and that are safe to use, Jamberry Professional Nail Lacquer might just be the lacquer for you. 

Thank you for reading and happy polishing!

Sunday, June 15, 2014

Nail Tool Review ~ Julep Cleanup Tool and Julep Cuticle Pusher

There are so many ways to clean up your fingers after a less-than-perfect paint job. I've been painting my own nails for over twenty-five years and while I get it right more often than not...when I don't, it's irritating.

There is of course, the free way, which is to use your fingernails to scrape away the excess. If you have had a manicure in a salon, you'll see that the nail techs will use this method frequently. However, that's not so convenient if you are on coat #3 of a hard-to-dry polish because you can easily smudge the polish on the nail that you are using as a tool. Another way is to use a Q-tip dipped in nail polish remover. Not a bad method, but there isn't really a pointed tip to the Q-tip and if you don't put enough nail polish remover on it to get it good and wet, the cotton fibers can stick to your still tacky polish.

If you are super-patient, you can wait until the next morning and just wash your hands in warm water and scrape off the polish. Nail polish is not meant to stick to skin and after it thoroughly dries and cures, it will peel right off your fingers.

The method that I have used for a long time which has worked for a while is to pour a little acetone into my small glass dish and use a long-handled brush to carefully dab around my fingernails for clean-up. If you wait until your top coat has set, it will usually protect your nails from any acetone runs. The brush that I use is just an old eyeshadow brush by Japonesque that I picked up at ULTA a few years ago that just never really did it for me on my eyes. Recently I have acquired clean-up brushes from butter London that work even better, and you can get those as part of their Colour Hardware Nail Art Tool Kit.  

However, sometimes you will find tools in the least unexpected places that will surprise you. I recently picked up two tools from Julep as add-ons to my Maven box that are proving to be invaluable tools to me when I manicure my nails. One is the Cleanup Tool and the other is the Cuticle Pusher. Unfortunately, you can only get these tools as part of their Well-Manicured Kit, but if you are in the market for a new nipper, emery board and clipper at the same time, these are great tools to have as well.


I ordered the Cleanup Tool hoping that the fine edge and the narrow corners would really do a great job with cleaning up the blobs, similar to how your nail works when you are scraping the polish off. I had tried using my metal cuticle pusher from Sally Beauty Supply and the beveled edge just wasn't quite narrow enough to get into the spaces between my nail and my skin. However, I was very pleasantly surprised with the Cleanup Tool. I paired it with rubbing Vaseline around the edges of my nails so that the polish wouldn't dry on my skin, and after I painted each nail, I used the tool to scrape off the error seamlessly and easily. It's even narrow enough to pick up the curve at the bottom of your nail around your cuticle without cutting your cuticle or pulling the skin away from the paint. I was very impressed. As seen here, I just painted my nails over a paper towel and every time I scraped an error, I wiped the tool on the paper towel and when I was done, I rinsed it in acetone and then water. It also works exceptionally well without the Vaseline if you scrape it quickly.


The cuticle pusher took me a little longer to adjust to. It's not your average metal cuticle pusher. I'm used to my chrome one from Sally Beauty Supply that has a beveled edge. With ANY metal cuticle pusher or nipper, you have to be very, very careful and not move too fast when using it. If you are not careful, you can drive the tool down into your finger and cut yourself or become infected. So please, pay attention when using these and go slow...it's not a race. The Julep Cuticle Pusher has two ends that are the same. Each end is rounded on the top and flat on the bottom, but the shape of the end is like a hook so you can really hook down into the bottom of your nail to remove your cuticle, but with that comes a warning. It's a hook. As in synonymous with ouchie? So move slowly, carefully and deliberately or else you could really have a serious injury with a lot of blood.

The first time I tried the pusher, I did it without any cuticle remover. I just warmed up my hands and started pushing the cuticle skin back. Not a good idea and quite honestly I stopped after two nails because something about the angle, the feel of the flat edge on my nail and the look just felt wrong to me.

Since then, I have used the tool twice and I have changed my opinion. However, I do think that to successfully use this, you need to use a cuticle remover cream or serum. I used Blue Cross Cuticle Remover to soften my cuticles first, and then, placing the flat side of the cuticle pusher on my nail, started scraping the sides of my nail and then hooking down gently into my cuticle area to pull out the removed skin. It was very effective, and I would recommend it if you are very diligent about cuticle maintenance. I clean up my cuticles three or four times a week, but if I were the nail enthusiast that maintained my cuticle area only a few times a month, I would probably opt for either a flat beveled edge pusher like my other one or the more traditional orange stick to push back the cuticle and then a pair of nippers to trim them. This one is just a little too dangerous to use unless you really know what you are doing and are comfortable using a metal cuticle pusher first. You could end up with the hook halfway down into your finger and a serious hand injury.


Enjoy, thanks for stopping by to read, and if you haven't heard of Julep yet, please do spend some time there checking it out. I have been a Maven with Julep for a few months and the benefits are fantastic. For the price that you spend per month, you really get a great box every month, the option to add on little goodies (like I did with these two tools), discounts, coupons, access to the Secret Store, and free shipping all the time. If you decide to become a Maven after reading my blog post, I'd love it if you would let me refer you so I can get a gift, so please leave me a message if that is the case. 

Happy Father's Day to all!

Monday, June 9, 2014

Cosmetic Review ~ Bare Minerals Well-Rested Eye Brightener

I have been a Bare Minerals user for about seven years. Up until then, my makeup routine basically consisted of pressed powder (maybe), a thin layer of either pink or peach shadow on my lid, mascara on my lashes, and clear lip gloss.

A trip to Sephora with my sister to get Mineral Veil changed all that. 

I had never even heard of Bare Minerals before I walked into Sephora that day. A makeover later, and I was walking out with the foundation starter kit and the eye starter kit. Things were much different back then, but basically I got everything I needed to start practicing my Bare Minerals look. Two colors of the original foundation in light and extra light, Warmth, Mineral Veil, a liner, three shadows and a variety of brushes. I was set! If you have been reading along with my blog, you have obviously come to the conclusion that I am a huge fan of the Bare Escentuals cosmetic line. In all fairness, I haven't tried any other mineral makeup except for the baked Mineralize Eye Shadows that MAC manufactures, so I am rather biased towards Bare Escentuals, but truthfully, I just really like mineral makeup. It works so well with my skin. I don't feel like I'm wearing a mask, it doesn't rub off on my clothes or my hands, and it doesn't bother my eyes. The eye shadows blend and work together so well that you can pretty much pick any combination, pair it with a liner, and they are going to work together and blend together to look fantastic. One of the things that I don't like about it is that it can be quite messy since they are loose powders, but over the years, Bare Escentuals has worked to create a line of pressed foundations, cream foundations, pressed eye palettes, eye pencils, and all kinds of different things to make putting it on easier and cleaner without losing that mineral appeal. I have invested in the eye shadow loose powders, so that is what I use at home, but I have a variety of the pressed items (such as the Duos) for traveling which are divine. You will be seeing a review of the new serum foundation coming from me in the future as I have two samples that I plan to try and review. My mother just switched from the original loose foundation to the serum, and she is very pleased with it, so I think that when the weather cools down in Texas in the fall, I may just be buying my first bottle of liquid foundation since my preteen years. 

But today, I am reviewing a product that actually was released a number of years ago called Well-Rested Eye Brightener. I can't tell you how many times I have been shopping for a concealer and picked this one up at the boutique, ULTA or Sephora, and then put it back down again. For some reason, the yellow color always made me shy away and buy one of the beige concealers instead. I have inherited some poor eyes from my mother's side of the family, and with that comes very pronounced circles under my eyes that are a very delicate pale shade of lavender. Throw in some stress, a few nights of less than perfect sleep or a good cry, and it's a disaster. Up until now, I have been using the regular concealor in Bisque for the winter months and Summer Bisque for the summer months. However, with my crazy sleep schedule after my foot surgery, my circles are so purple and the bags so pronounced I could make a set of Louis Vuitton suitcases.

So, after many years of working with the regular concealer (which by the way is also a fantastic product), I finally walked into a boutique a few weeks ago with my coupon for my birthday eye shadow in hand, picked up Well-Rested, and BOUGHT IT at long last. What will really throw you if you put it side by side with one of the concealers is that Well-Rested is definitely a yellow tinted powder, whereas the concealers are beige and well, look more like concealers. But there is a reason for this...the yellow is there to counteract the purple color and brighten your circles so that when you use it, you clearly have a look on your face that suggests youth and happiness, and best of all, gives the appearance that you slept a full eight to ten hours the night before...even if you have not. And it has sunscreen in it which is always a plus.


I was taught how to use it by the lady at the boutique the day I bought it. It obviously works very well in conjunction with their signature foundation products in loose powder form. I will report back when I try it with the serum, but since it is a concealer that is recommended to be put on over your foundation instead of under, I can't imagine that it wouldn't work well. To put on my face with Well-Rested, I used the Maximum Coverage Concealer Brush with the Well-Rested, the Soft Focus Face Brush, Mineral Veil and and the Original Foundation in Light. 


If you are a mineral makeup user or have seen a Bare Minerals demonstration on QVC or a makeover at the store, you are most likely familiar with the basic process. If you are not and are curious, I can't recommend enough heading to your nearest store that carries Bare Minerals and asking for a demonstration. It is also a great way to get a color match for your foundation. You pick up product on your brush and drop it into the lid of your foundation. You swirl the brush around in the product to get it in the brush. You tap the brush on the side of the lid and then start applying the foundation in a circular movement starting at your temples and moving down your cheeks and nose and ending at your chin. I always start at the top of my face because this is a loose product and it will sprinkle downwards onto your face. Once you have the desired effect, take your concealer brush, pick up some of the Well-Rested and apply it in dabs under your eyes. I apply mine right to the line between the apple of my cheek and where the circle begins and use my brush to blend it into my foundation. 


I have used Well-Rested several times since I bought it and there have been a few times where the product doesn't blend in perfectly into my foundation. I can almost see a white spot. It always brings up thoughts to me of all the pictures in the media of celebrities who have been photographed with their white powder reflecting the glare of the flashbulbs. Obviously, I'm not walking the red carpet anytime soon, but whenever I notice this being a problem, I use my ring finger (the weakest finger so it doesn't pull on my skin) to just lightly blend it out. If needed, I will swirl, tap and blend another small amount of foundation under my cheeks, but then one coat of Mineral Veil and I'm done. 

My right eye is the one with Well-Rested. My left eye just has foundation applied.
So that's it! You don't need a lot to get rid of the circles, so the size of the container will last you quite a while. I don't anticipate having to replace mine for several years. The beauty for me with Bare Escentuals makeup is that since it is mineral, it is not going to go bad like other products do, so I never worry about bacterial growth or mold. Just keep your brushes clean, keep your lids tight and you're good to go. 

Well-Rested retails for $18 online, at the boutiques, and you can also purchase it at Sephora, ULTA and just about anywhere that carries Bare Escentuals. Keep in mind that ULTA does consider Bare Escentuals a Prestige cosmetic so unless you have a B.E. specific coupon, those fun coupons on the bottom of the flyers aren't going to work. 

Enjoy, happy tapping and thanks for reading!

Saturday, June 7, 2014

Cosmetic Review ~ Sonia Kashuk Extreme Wear Eye Primer + Sweepstakes Link

In my blog readings late at night, I came across an interesting blog, The Small Things Blog, written by a lady in North Carolina named Kate, which is where I am from as well. So far I have really enjoyed reading her blog, and of course, the references to all things North Carolinian (except for the post about Duke...sorry, Kate, I'm a Tar Heel and bleed Carolina blue).

Her blog brought to my attention a sweepstakes that Sonia Kashuk is sponsoring for a $100 giftcard to Target. I had not tried this makeup yet since I'm a die-hard Bare Minerals user, but as I've stated before, I love free things (I bet you do too) and I am always willing to try new things. Plus, $100 buys a LOT of things at Target...food, clothes, shoes, makeup, and....nail polish, my favorite! Target carries OPI, Essie, Nicole by OPI, Sally Hansen and a number of other nail polish and cosmetic brands.

To enter this sweepstakes, please visit Kate's blog entry regarding Sonia Kashuk's products here. You can also learn more at soniakashuk.com and visit the Sonia Kashuk page at target.com.

Please note that a comment left on THIS blog will not generate an entry into the sweepstakes. YOU MUST GO TO THE SMALL THINGS IN ORDER TO ENTER. I am simply sharing this contest with all of you, and by blogging about it, I also get an extra entry into the sweepstakes and I get the chance to share my new blog on a more well-known blog. The internet is a big place and there is plenty of room for everyone. The sweepstakes started on May 5 and runs through June 30, so if you are reading this article late (I'm obviously posting it late), not to worry! You have plenty of time! Just click on the link above, leave a comment in response to the sweepstakes/giveaway along with the Sonia Kashuk product that you are most interested in trying this spring (I'm interested in the ultra luxe lip gloss in polished plum), and you're good to go! You can also get an extra entry by tweeting about the sweepstakes if you are on Twitter or blogging about the sweepstakes if you have a blog of your own. I am on Twitter at @ATSaShimmers and would love for you to follow me there. If you do read my blog and have a blog of your own, please leave the link to your blog in the comments so I can read your blog as well. The official sweepstakes rules are listed here on The Small Things, and include different ways that you can enter the contest.

However, I can't in good conscience promote a cosmetic line that I haven't tried myself, so I went to Target to check it out and the thing that jumped out at me the most was...well, everything!!! I was amazed that I have never come across this line before in all the times that I have gone to Target. Mind you, it wasn't obvious. I went up and down the aisles a few times and then, bam!

I was truly amazed at the selection. There was everything to look at from train cases to mascaras to foundations galore to lipsticks and lip glosses...even a tiny line of nail lacquers.


I'm not big enough yet that I'm getting products to review for free, so I bought what I thought I needed and would be a good addition to my collection. That's why, at least for now, you are not going to see the latest things reviewed here, because right now we are reviewing what we like and what works for us. So once my eyes stopped bugging out and I settled down and got serious, I ended up buying the Extreme Wear Eye Primer for $9.99. It was a very close call though...the red lip gloss almost won, but I kept reminding myself how I have lots of red lip glosses but not too many eyelid primers. And for some strange reason, I don't use them that often...really only on special occasions. I have Too Faced Shadow Insurance that I got as a birthday gift from Sephora and two tubes of Prime Time Eyelid Primer from Bare Escentuals. What I remember the most from using the ones that I have is that they smooth out my eyelid prior to applying eye shadow and hold the shadow firmly in place until the end of the night when the eye makeup remover is swiped on.


The reviews on this were about 50/50. One person said that the texture wasn't very smooth; another didn't like the shape of the container that required the use of a tool to get it out. I agree that it is a little odd to have primer in a small jar when most eyelid primers are in tubes that you squeeze onto your ring finger and then smooth onto your eyelid, but this is a unsolicited candid review. Initially I thought about using a mix of products to sample this, but in the end, I decided to just stick with what I will be using this most with which is my favorite, Bare Minerals. 

First, I started with a clean eye and a clean brush. After examining the size of the container and the consistency of the primer, I decided to use a tapered shadow brush to pull out some primer and apply it to my lid, sweeping gently over the entire lid and up into the brow area where my highlight shadow is applied. It is a tad pasty and requires a little bit of patience to work with it.


Next, I applied my lid color, Water Lily, with an eye defining brush.


Next, I applied my crease color, Bloom, with a crease defining brush.


Last, I applied liner (wet) and mascara. I used Sugar Plum with a liner brush, topped the liner with Urban Decay glitter eyeliner in Metal Head for extra pizazz, and curled and applied Lash Domination mascara to my upper and lower lashes.


I then repeated the same on the other eye but without the primer. In the picture that you are looking at, the eye with the X above it is the one that has the primer used with it.


My thoughts? It's a very mixed bag. I honestly don't know if the mixed result I got was because of the product, because of my age, because I didn't use it with Sonia Kashuk shadows, or because I applied too much. If it was because I didn't use it with the same line of shadows, that's disappointing since you should be able to mix products and have each product stand on its own. I'm very loyal to Bare Escentuals, but I have eyeshadows by ULTA, MAC, and Julep in my collection. I don't know any woman that is exclusive to one line of cosmetics. The colors were so vibrant and bright, which was awesome. I loved that part. The colors blended well together but the lines of the different colors were a little
distinct so it wasn't a smooth transition from the lid color to the crease. This could be good or bad depending on what you are looking for. It almost sort of looks like a theatrical eye. I did apply my shadows with a heavier hand than usual to get a true comparison, and there's no question that the colors are very bright and colorful. It did last a very, very long time compared to my eye without the primer, including the Urban Decay. Typically when I use the Urban Decay glitter liners, they end up flaking off throughout the evening and decorating my cheeks and occasionally getting into my eye. That did not happen with the primer application on my right eye.

Below is a picture of my eye right before removing the makeup, almost six hours after application.


For me, the worst part about this primer was that I felt like it accentuated all of my wrinkles, and that's not a good thing for me at thirty-nine years old. On the eye with the primer, my lid area right above the crease almost looked...scaly like a dragon's tail. Not smooth and polished which is what I am used to expecting with my other primers. Who knows? Maybe I just need a good eye cream! My tried and trusty Prime Time Eyelid Primer by Bare Escentuals is almost double the price of this one and Too Faced Shadow Insurance is absolutely double the price, so if you are looking for a really inexpensive alternative and have issues with your eye makeup staying on, this might be a good option for you.

Will I use this again? Yes, but I will use less and will only cover the lid in the future to see if it makes a different. And as a matter of fact, as I was in the process of finishing this article, I decided to give this primer a second run, but applied a little less and stuck to the lids only. This time, I used green matte colors to see if that made a difference as opposed to the shimmery purples from above...specifically Velvet Emerald, Velvet Pistachio and For Real, with Urban Decay glitter eye liner in Mullet on top of the eyeliner.

The result? Much better with the smoothness and the colors did pop, same as the purple.


So ultimately...not a five-star product, but considering the price I got this for, it wasn't bad. I think I'll be adding eye cream to my regimen at night though.

Good luck in the sweepstakes and thank you for reading!

Wednesday, June 4, 2014

Hair Product Review ~ Paul Mitchell Awapuhi Wild Ginger Styling Treatment Oil

My hair is straight. Stick-straight. And thin. I'm talking no life, no body, nothing. If there was negative curl, my hair would be it.

What is worse? What is worse is having hair that refuses to do what you want it to do. Over the years, I have tried mousse, gels, hair sprays, and finally, sometime in college, just gave up. Nothing is worse than feeling like your hair is sticky or dirty all the time, and I am one of those people that always has her hands in her hair. I try not to but it's a hard habit to break, like nail biting. And if you mess with your hair, you stimulate oils. 

My solution to the problem was simple. I just let it grow and pulled it back. No fuss, no muss, no styling, no products. The end result was that I looked like I was stuck in the 1970s forever. And I was born in the 1970s. On a trip with my sister, she suggested that I do something different and cut it. I did cut it into a wedge. I cut off fourteen inches and donated the hair to Locks Of Love. (By the way, please keep this wonderful cause in mind if you ever decide to cut off your long hair.)

Over the next two years, I slowly cut my hair shorter and shorter and shorter. Every time I went to the stylist, I told her, "Just a little bit more, it's just hair." I kept waiting for that magical I-don't-have-to-do-anything hair style to appear. I tried some products. I tried a flat iron. I tried a large round brush. Nothing worked, my hair never could be replicated to even a smidgen of what the girls in the salon could make it look like. Granted, I know that I'm not supposed to be able to do that...if I could, they wouldn't have jobs!

Then, the hair product that I can't live without to this day entered my life when my stylist said, "I'm going to try some styling oil on your hair." Tiff, if you're reading this, I'm talking about you! My first reaction was, OMG NO! OIL!? ON MY HAIR!? I even think the look of horror was evident on my face. If I had one word to describe my hair, it is oily all the time. The only time it is NOT oily is right after I shower and dry it. 

Obviously, if I am saying that I can't live without it, you have figured out that it was a winner, winner, winner! I don't travel without it now. I put it into a big Ziploc bag and off it goes with me when I travel, but every time before I blow out my hair, it is rubbed very lightly through my wedge locks. 

There are so many good things I can say about this product. Paul Mitchell Awapuhi Wild Ginger Styling Treatment Oil is the stuff of dreams where my hair is concerned. Where to start?


For starters, you don't need a lot. And I mean it. This is not conditioner, ladies, where the directions say use a dime-size and we all put on a silver dollar size. We all do it. Why else do we all run out of conditioner faster than shampoo? A dime-sized amount in the palm of my hand is the perfect size for my chin-length tresses, so I'd say start small depending on the length of your hair and increase accordingly. Too much and you could have a serious hair disaster I rub it on my hands and lightly run my hands through my hair, avoiding rubbing it into my scalp. A small bottle of this great stuff lasts me three to four months, and the bottle in the picture above I anticipate will last at least a year. 


Second, the smell is rather pleasant...if you like the smell of ginger. Now, it's a pleasant scent...you don't conjure up images of PF Chang's or gingersnaps when you put it through your hair. I'd describe it more as a pleasant earthy smell, like what you would smell in a spa, with ginger undertones. It's not a bad thing and it's not strong. I only mention it because if you have an aversion to ginger, it may bother you, but I find it pleasant. 

Third, the effect that it has on my hair is wonderful. It smooths my hair, it tames, and it gives my hair just that little bit to be able to hold the shape that I give it when I am blowing it out. For my haircut, I blow my hair completely dry on high, and then turn the blast down to low but still on high heat to round brush the ends so they curl under. And best of all, my hair doesn't feel like there is a product in it, which is really hard to achieve with as thin as my hair is. It just feels silky but not oily. 


The other two items that complete my hair team are my hair dryer, Andis Professional 1875 Ionic Ceramic hair dryer, and my round brush, the Spornette Prego Medium Ceramic Round Brush #265. My hair dryer has the perfect amount of heat and perfect amount of air, and I love my round brush so much, I bought a second one when I found it on sale for traveling. I have tried other round brushes, but there is something about the amount of bristles that this particular brush has that is perfect for holding my hair. Plus, it has a ceramic barrel and it heats up when my hair dryer blows on it which helps with the slight curling under that I work for on my hair. 


If you are looking for a different hair product to try, give this one a shot. It's not terribly expensive and don't let the word "oil" dissuade you. My only complaint about it is that it is hard to find locally. I can get it at my hair salon, Visible Changes, very readily, but when I run out and don't want to make the trek across town, it's nowhere to be found in other salons that carry Paul Mitchell. Fortunately, you can order it online with no problem from Amazon, or check your local Walgreen's.

As always, all products discussed in this article are featured on our Pinterest board if you would like to follow us there. Thanks for reading!

Sunday, June 1, 2014

Polish Review ~ butter London All Hail The Queen and Julep Gianna

P&S. Have you ever heard this expression? I have never heard this expression until I met a very special group of nail divas on Facebook (both new and old friends) who introduced me to the term. It means "Professional and Sh**". This can describe any polish in your collection that you would feel comfortable lending to your mother or grandmother without any eye rolling, and more specifically, a polish that you would feel very comfortable and polished wearing to a job interview, a first day on the job or a meeting with corporate higher-ups where your hands are going to be on the table in plain sight of the people around you. 

I work in insurance as a property insurance adjuster. It's a boring industry (at least from the outside looking in), but there it is. I also used to be a manager. I have both interviewed and been interviewed many, many times. Even though the line of work that I am in requires that I get dirty on a regular basis and sweat like a pig during the summer, it is still expected that I show up dressed to the nines for a job interview. You dress for the job you want, right? And when you are sitting across the table from the person who could be making the final decision between you and one other person, you don't want to even wonder later if it was because your hands looked like they had been run through a meat grinder. I always joke with my male counterparts that if they ever meet a female property adjuster who is getting acrylic or silk wrap manicures in a salon on a regular basis, you can guarantee that she is not checking her own roofs for hail damage. However, even though that is the case, I still make sure that my hands look nice whenever I am out with clients, in interviews, in meetings or on the first day of a new job. I didn't even relax on the first day of my new job until I saw that the receptionist was wearing teal nails with white accent nails. 

On the other hand, you don't want your nails (or makeup or jewelry for that matter) to scream, "Look at me! Look at me!" Elegant, understated and professional is the way to go. As I wrote about foot appearance when wearing flip flops, hand appearance is equally important when you are at the table with someone whose impression of you is going to be looking at your face, your clothes and your hands. I admit it...when I was interviewing someone for a job and they started to ramble, my gaze would drift down to their hands to see if they were a nail-biter, if they tore at their cuticles, if their polish looks like it was put on last year, whatever. Personal grooming says a lot about people. On the opposite, so does your choice in nail polish, makeup and jewelry. Until you have the job and you have taken the temperature of the people you are working with, you want to keep things a little toned down. Bright brassy colors are fun but can also send the message of "not serious". Glitters and prisms are eye-catching, but can be distracting to the person talking to you and...please note that I strongly disagree...can come across as immature to the older crowd even though they are so very in-style right now. I am very much a glitter, bling-bling and shiny stuff girl...so much so that the night before a day where I need a "Professional and Sh**" look, I have to pick out everything I'm going to wear right down to my lip gloss and make sure that it's not too much. Light shell pinks are always nice. They are feminine, pretty, understated and not too flashy. Sheer colors like white and lilac are very delicate and won't garner too much attention. Nudes, in my opinion, are the best choice of all because they are sure not to catch any eyes but will look very understated and proper when someone takes a look at your hands (and I promise you, they will).

Hence, the segue into my reviews on butter London's All Hail The Queen and Julep Gianna. 

Photo courtesy of www.butterlondon.com

Photo courtesy of www.julep.com


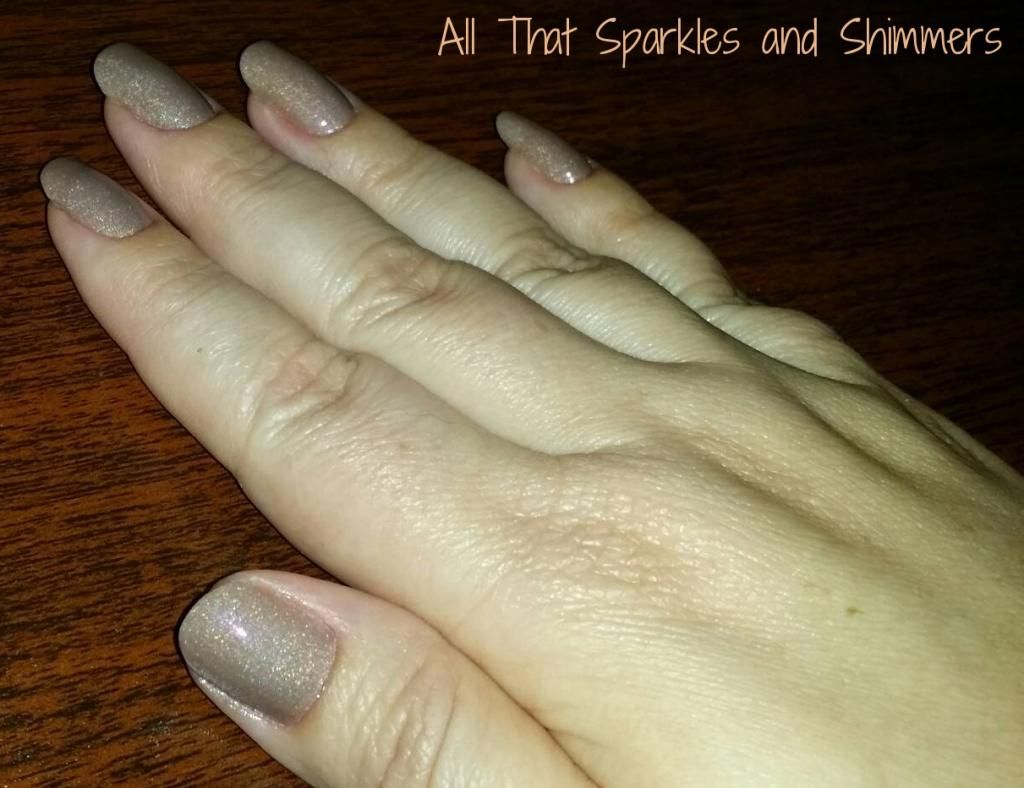
I have a small rack of nudes specifically for job interviews and days when I need to be all P&S, and if you are looking for a high-end polish with a little sparkle, this will definitely fit the bill. I bought this polish on sale during ULTA's Twofer annual butter London sale a few months ago at the recommendation of a fellow butter London afficionado that said that this polish is perfect for everyone. Ummm....yes and no. The description that butter London gives All Hail The Queen: "Rock it like royalty in this opaque, holographic beige nail lacquer. If you love our best selling lacquer Yummy Mummy, then this winter version will delight!" The butter London dictionary even goes one step further and defines All Hail to be "used as an acclamation or welcome, as in 'All Hail this gorgeous lacquer'". I'm not really sure I would use the words "rock it" to describe this polish, but could I see Princess Kate or Queen Elizabeth wearing it? Most definitely, yes. I think that this is a polish that can look different on a lot of different people given their skin tone and color. On me, it wasn't a winner. In fact, it made my nails look...dead. To quote a friend who looked at it after I put the top coat on, a tad corpse-ish. She even went further to say, when asked if it looked professional, than why, yes, it did look professional...for a morgue. I'd have to agree. Just not my color. But would I feel comfortable wearing it for a job interview? Absolutely.


As always with butter London, the application was perfect. It went on smooth, dried to a glass finish and two coats was plenty for opacity. The durability was fantastic. I left it on for three days and did not have one chip. On the third night I had very, very hard to see tip wear and new growth appearing at the bottom near my cuticle, but I would venture to guess that I could have left my manicure on for several more days with some minor touching up. It does have a holographic appearance to it, but it is scattered and not linear, so it would be very nice for the proper occasion.

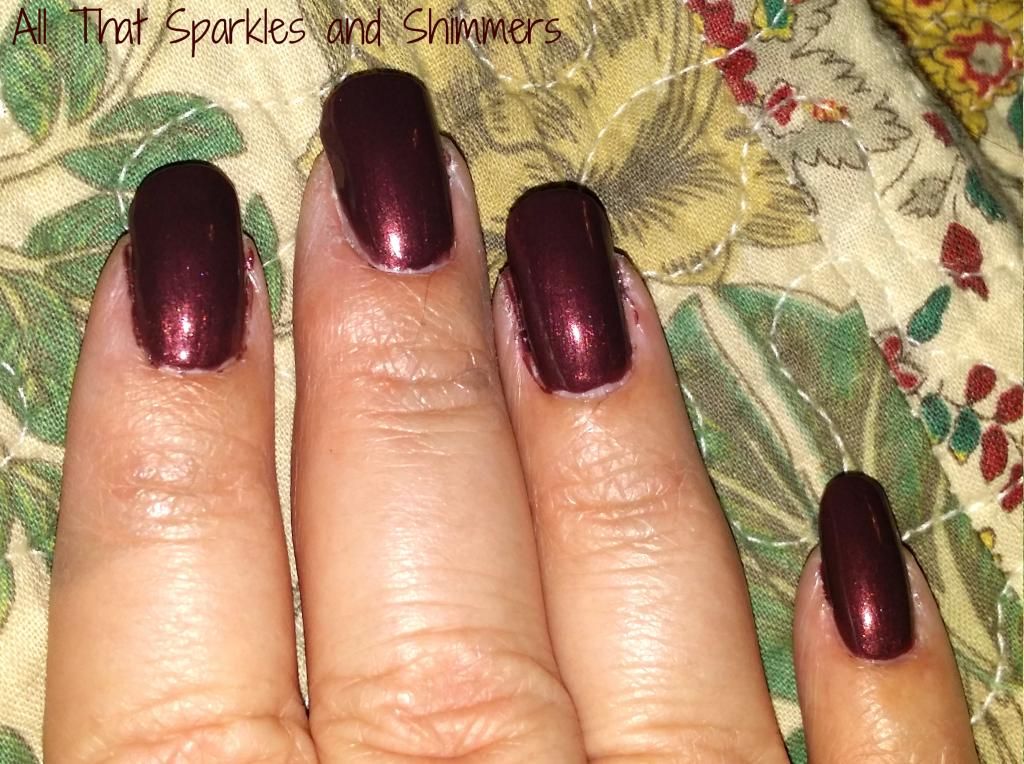
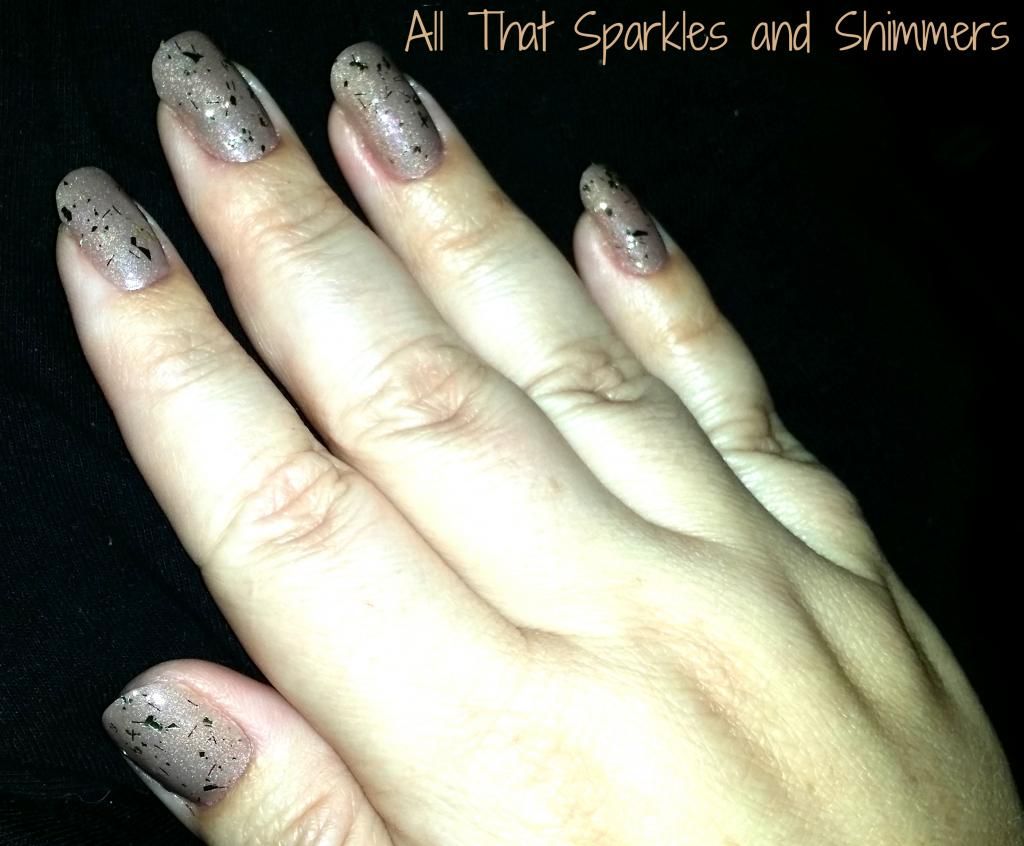
However, the appearance for me was the kicker. By itself, my nails looked very, very dull, albeit professional. But after adding one layer of Julep Gianna, the color almost changed to a milk chocolate. Julep Gianna is a flake glitter described on the Julep site as a "jagged gold glitter top coat". It is truly unique from the other gold glitters in my collection. What made me select it was that I honestly wanted a glitter with some size to it to mix up the lacquer, and this did that. It is like little pieces of gold foil in a clear suspension so there is no alteration of the below color. It spread very evenly and without having to dig in the bottle like is necessary for other flake glitters or hex glitters. It dried very smooth, although be wary if you get a flake that sticks out over the edge of your nail or doesn't lie down flat. After I applied my top coat and it dried down, I noticed that there were a few flakes that stuck up through the top coat or hung over the edge of my nail, and once they hardened they were borderline sharp. I was able to take care of them with a emery board applied very lightly so as to not blemish the finish, but the next time I use Gianna, I think I will take a closer look before applying my top coat. I also think that Gianna would make an excellent accent nail, but would require 3-4 coats for full coverage, so I would recommend a gold base first.


I will be keeping this, but it's definitely on my P&S shelf. 
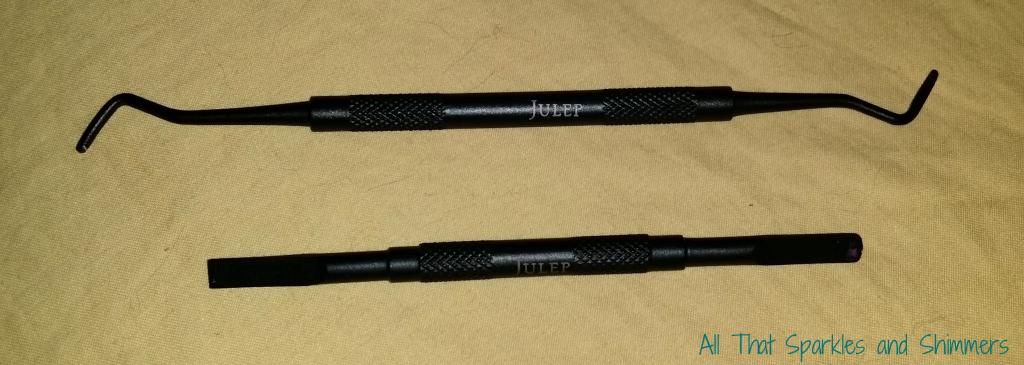
You can order All Hail The Queen at butter London's site for $15 and Gianna on Julep's site for $14. My polish price point is $9, so obviously I got these both on sale. I would recommend that if you are interested in these polishes but not willing to pay the steep tags, put them on your wish lists and wait for the sales.