
Every night I read blogs, mostly beauty blogs, and absolutely marvel at the nail artists that are out there. Terms like "gradient", "accent nail" and "stamping" are thrown around so lightly. I have to admit that I am utterly fascinated by the nail art that I see every night and, yes, I do aspire to do some of it. Every time I come across a how-to tutorial for a design, I scour it for the secret to success, and while I have picked up a few tips here and there, I still have a long way to go. I am patiently waiting for my Julep Creativity kit to come in June which contains a striping brush and dotting tool, and I look forward to seeing what I can do with that. I'm pretty good at sketching, and I enjoy drawing.
However, I think that on the whole, most women that do their own nails are probably like me...they admire the nail art, aspire to be able to paint sunflowers or Easter eggs or Christmas trees on their nails, but in the end just are proud of themselves when they can do a French manicure freehand without guides or tape and smile when they manage to paint their nails without having to do much clean-up. I'm pretty proud of myself that I taught myself how to paint my nails by the age of fourteen even though I am very dominant with my right hand. However, to all those women out there like me, I say, keep on keeping on, because there is a lot of polish out there and we have a hell of a lot of manis and pedis ahead of us. And...art is an expression...yes, even nail art! I think creating a beautiful look on ten very small canvases is quite an accomplishment, and with all the different colors, textures, glitters and objects that you can glue on your nails, it's a pretty freaking cool art form!
I came up with the idea for my nail art yesterday when my yellow Lab Katie got very sick and we had to take her to the vet. My baby is thirteen which is about the end of a Labrador's life span, so we are gently preparing ourselves for the tough decision that comes with owning a pet. However, our vet, bless her, thinks that she might be able to stabilize Katie as she may have "old dog" vestibular disease. After researching this on the internet, I found out that this is pretty common and treatable, thank God, but we are still going to be waiting for the vet to release her. I just got a call a little while ago that she is doing great and her bloodwork is solid.
Last night, as a good luck charm, I did a pawprint manicure which was a lot easier than I thought. I selected Brooklyn by Zoya from their Awaken collection, which is a pale rich yellow metallic lacquer, and matches my dog's fur, and Hard-Kourt Fashionista from a Nicole by OPI mini set inspired by the Kardashians. I would suggest always having all your colors picked out ahead of time before you start. This was my first time using either color, and both applied very well and very smoothly, although Brooklyn was a little on the thick side.
 |
| Picture courtesy of zoya.com |
 |
| Picture courtesy of beautyjunkiesunite.com |
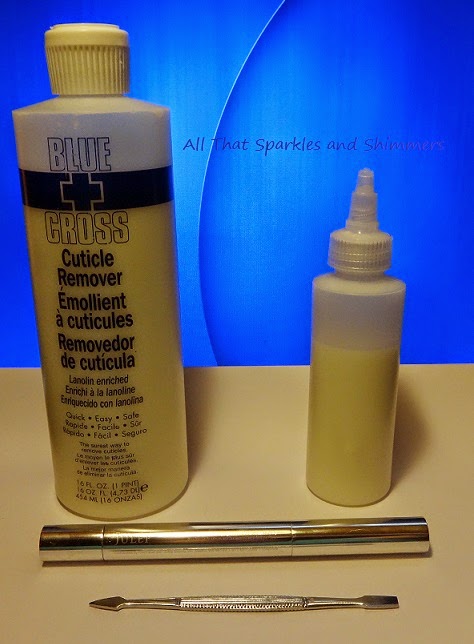 1. To achieve my mani, I started with clean, buffed and cuticle-free fingernails. I tried Blue Cross Cuticle Remover for the first time ever tonight, and was truly amazed at how much dead skin I removed. If you are looking for a great cuticle remover that is really mess-free, I would suggest giving it a try. This huge bottle is enough to last you and probably ten of your friends for thirty years worth of manicures. In order to fit into my cute basket, I filled up a small plastic squeeze bottle with it. To use it, I got a nail bowl of warm soapy water, a metal cuticle pusher, and several paper towels. I spread out the paper towels on my computer desk, which is where I do my manicures in bed, and used the squeeze bottle nozzle to flood the sides and base of my nail bed. I then took the metal pusher and gently pushed back my cuticles, moving the wedge back and forth to loosen the dead skin. The last step is to soak my fingers in the soapy water, using your other fingers to make sure all the dead skin is sloughed off. Repeat with the other hand. I moisturized my hands and applied Julep Mighty Nail & Cuticle Serum afterwards as a conditioner.

And the inspiration, my yellow Lab Katie. *smile* I miss her and can't wait for her to come home.

Have fun with your nail art!
No comments:
Post a Comment